
1. 方案介绍
React Native中提供了元素位置的检测接口measure和measureInWindow,但接口的能力比较简单,只能通过主动触发获取元素的位置信息,如果在业务中直接使用该接口会带来大量的额外代码,增加业务负担,同时不利于代码维护。
因此,本方案基于Web场景下最流行的Intersection Observer API对measureInWindow进行封装,同时基于事件通知进行检测触发,实现了较为复杂的场景下,组件曝光检测的能力。
基于Intersection Observer API封装的原因
1) 该API是Web场景下最为流行的曝光检测方案,因此学习成本低,同时在Web与React Native中进行同构开发更为方便。
2) 封装灵活性高,基于该封装提供的标准接口,我们还可以实现以下功能:
- 图片懒加载: 当图片滚动到可见时才进行加载。
- 内容无限滚动: 也就是用户滚动到接近内容底部时直接加载更多,而无需用户操作翻页,给用户一种网页可以无限滚动的错觉。
- 触发式动画: 在用户看见某个区域时执行任务或播放动画。
与业界方案对比
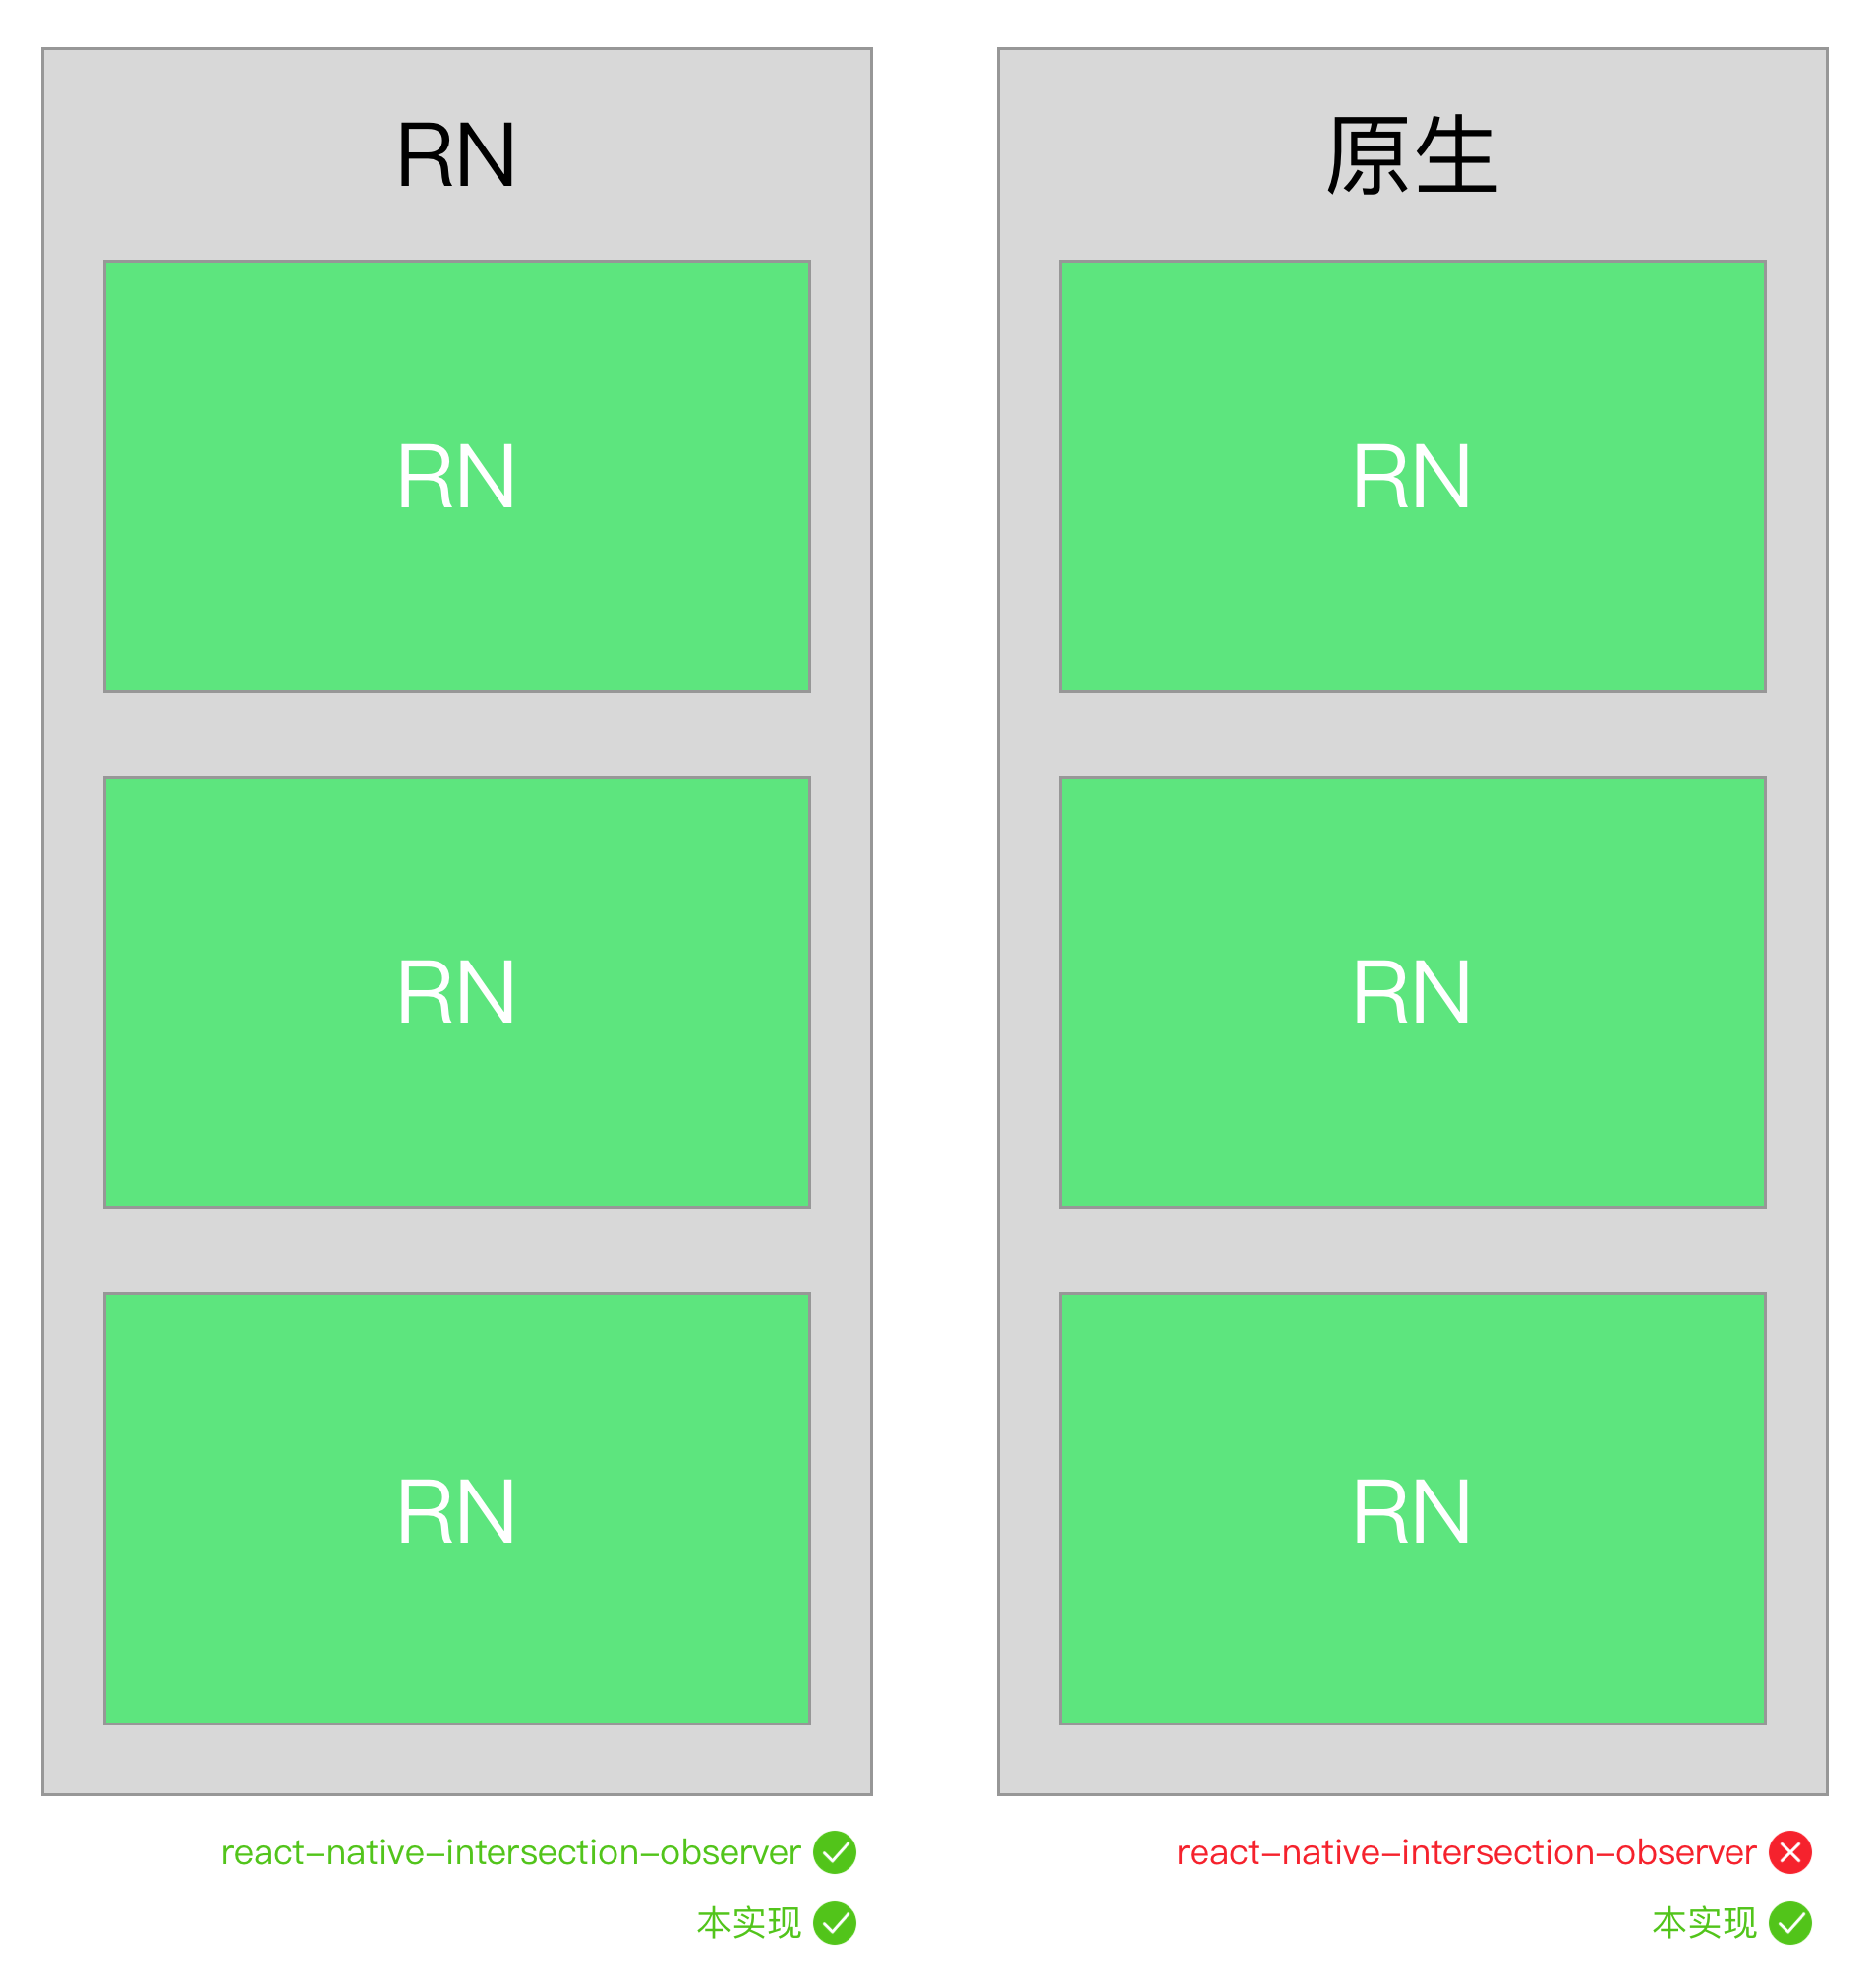
业界的类似方案已有react-native-intersection-observer,同时,直接使用原生的measure/measureInWindow也能实现相关功能,以下是本方案与这几个方案的对比:
| 方案 | 触发方式 | 额外代码 | 原生嵌套RN | ScrollView嵌套 | 自定义触发时机 | 按需触发检测 |
|---|---|---|---|---|---|---|
| measure/measureInWindow | 主动调用 | 多 | × | ✓ | ✓ | ✓ |
| react-native-intersection-observer | 滚动触发 | 非常少 | × | × | × | × |
| 本方案 | 事件触发 | 较少 | ✓ | ✓ | ✓ | ✓ |
采用事件触发模式的原因与优势
- 兼容原生View嵌套React Native子元素的场景
事件触发型检测可以将触发器放在原生代码中,只需要给外部滚动组件绑定触发器,就可以在内嵌于原生View的RN组件中使用IntersectionObserver进行曝光检测。
- 兼容自定义触发时机
除了onScroll事件以外,scrollView同时也提供了类似onMomentumScrollEnd(滚动动画结束)等事件,对比用HOC包裹ScrollView的方案,使用事件触发可以根据需求给不同的滚动事件绑定触发器,可以满足更多的曝光场景需求。
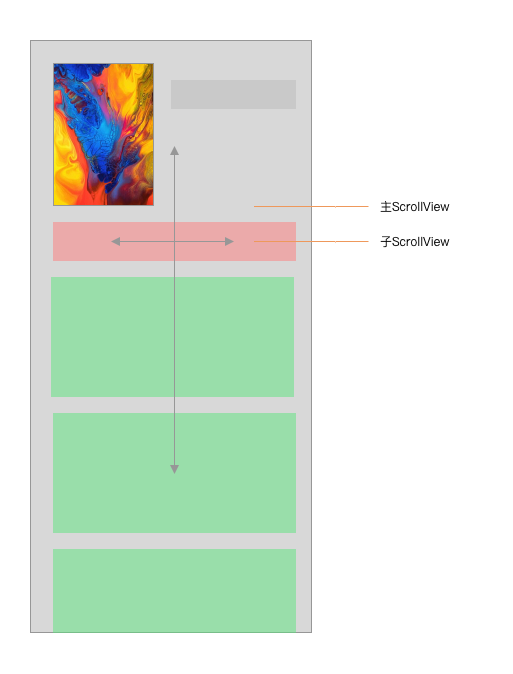
- 兼容多个ScrollView嵌套的场景
通过给两个ScrollView绑定相同scope的触发事件,可以实现多个嵌套的ScrollView触发同一个IntersectionObserver的曝光事件,提高了代码的可复用性。
2. 实现过程
1) 核心原理
React Native提供了measureInWindow接口,可以获取组件在屏幕中的位置。
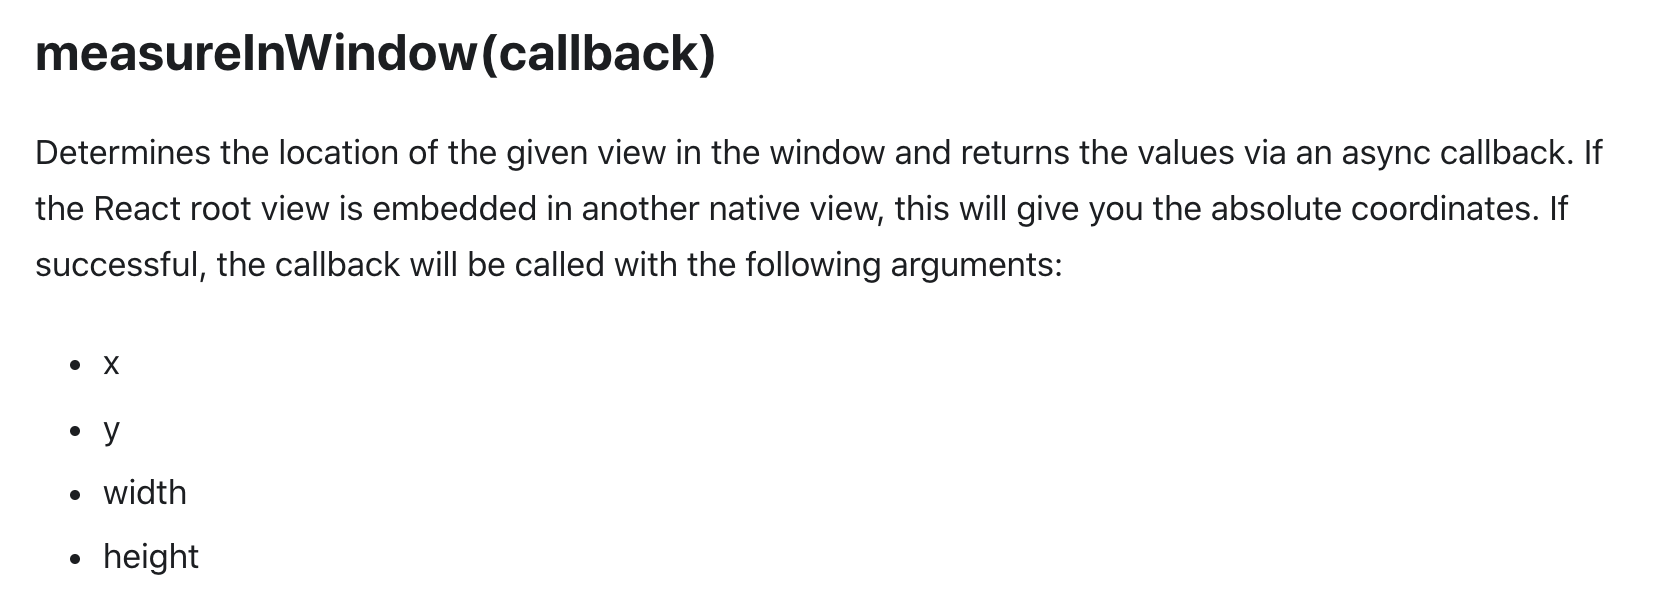
measureInWindow可以提供x、y、width、height四个关键位置和大小信息,通过计算可以确定组件的四个端点,从而计算出曝光比例。
2) rootMargin与thresholds参数
本实现依据Intersection Observer API标准实现了rootMargin与thresholds能力,便于使用者根据需求定制不同的触发时机与触发位置。
rootMargin: 用于设置触发区域与屏幕四边的距离,方便排除滚动条、状态栏与Tab栏的影响。
thresholds: 用于设置触发阈值,范围是0-1,在滚动过程中,每当元素的相交比例与上次检测相比,超过或低于任意一个阈值,都会触发事件回调。
例如:当设定thresholds为[0.5]时。
    1.前一次检测相交比例为0.4,后一次检测时相交比例为0.6触发回调intersecting = true。
    2.同理前一次检测相交比例为0.6,后一次检测时相交比例为0.4也会触发回调,此时intersecting = false。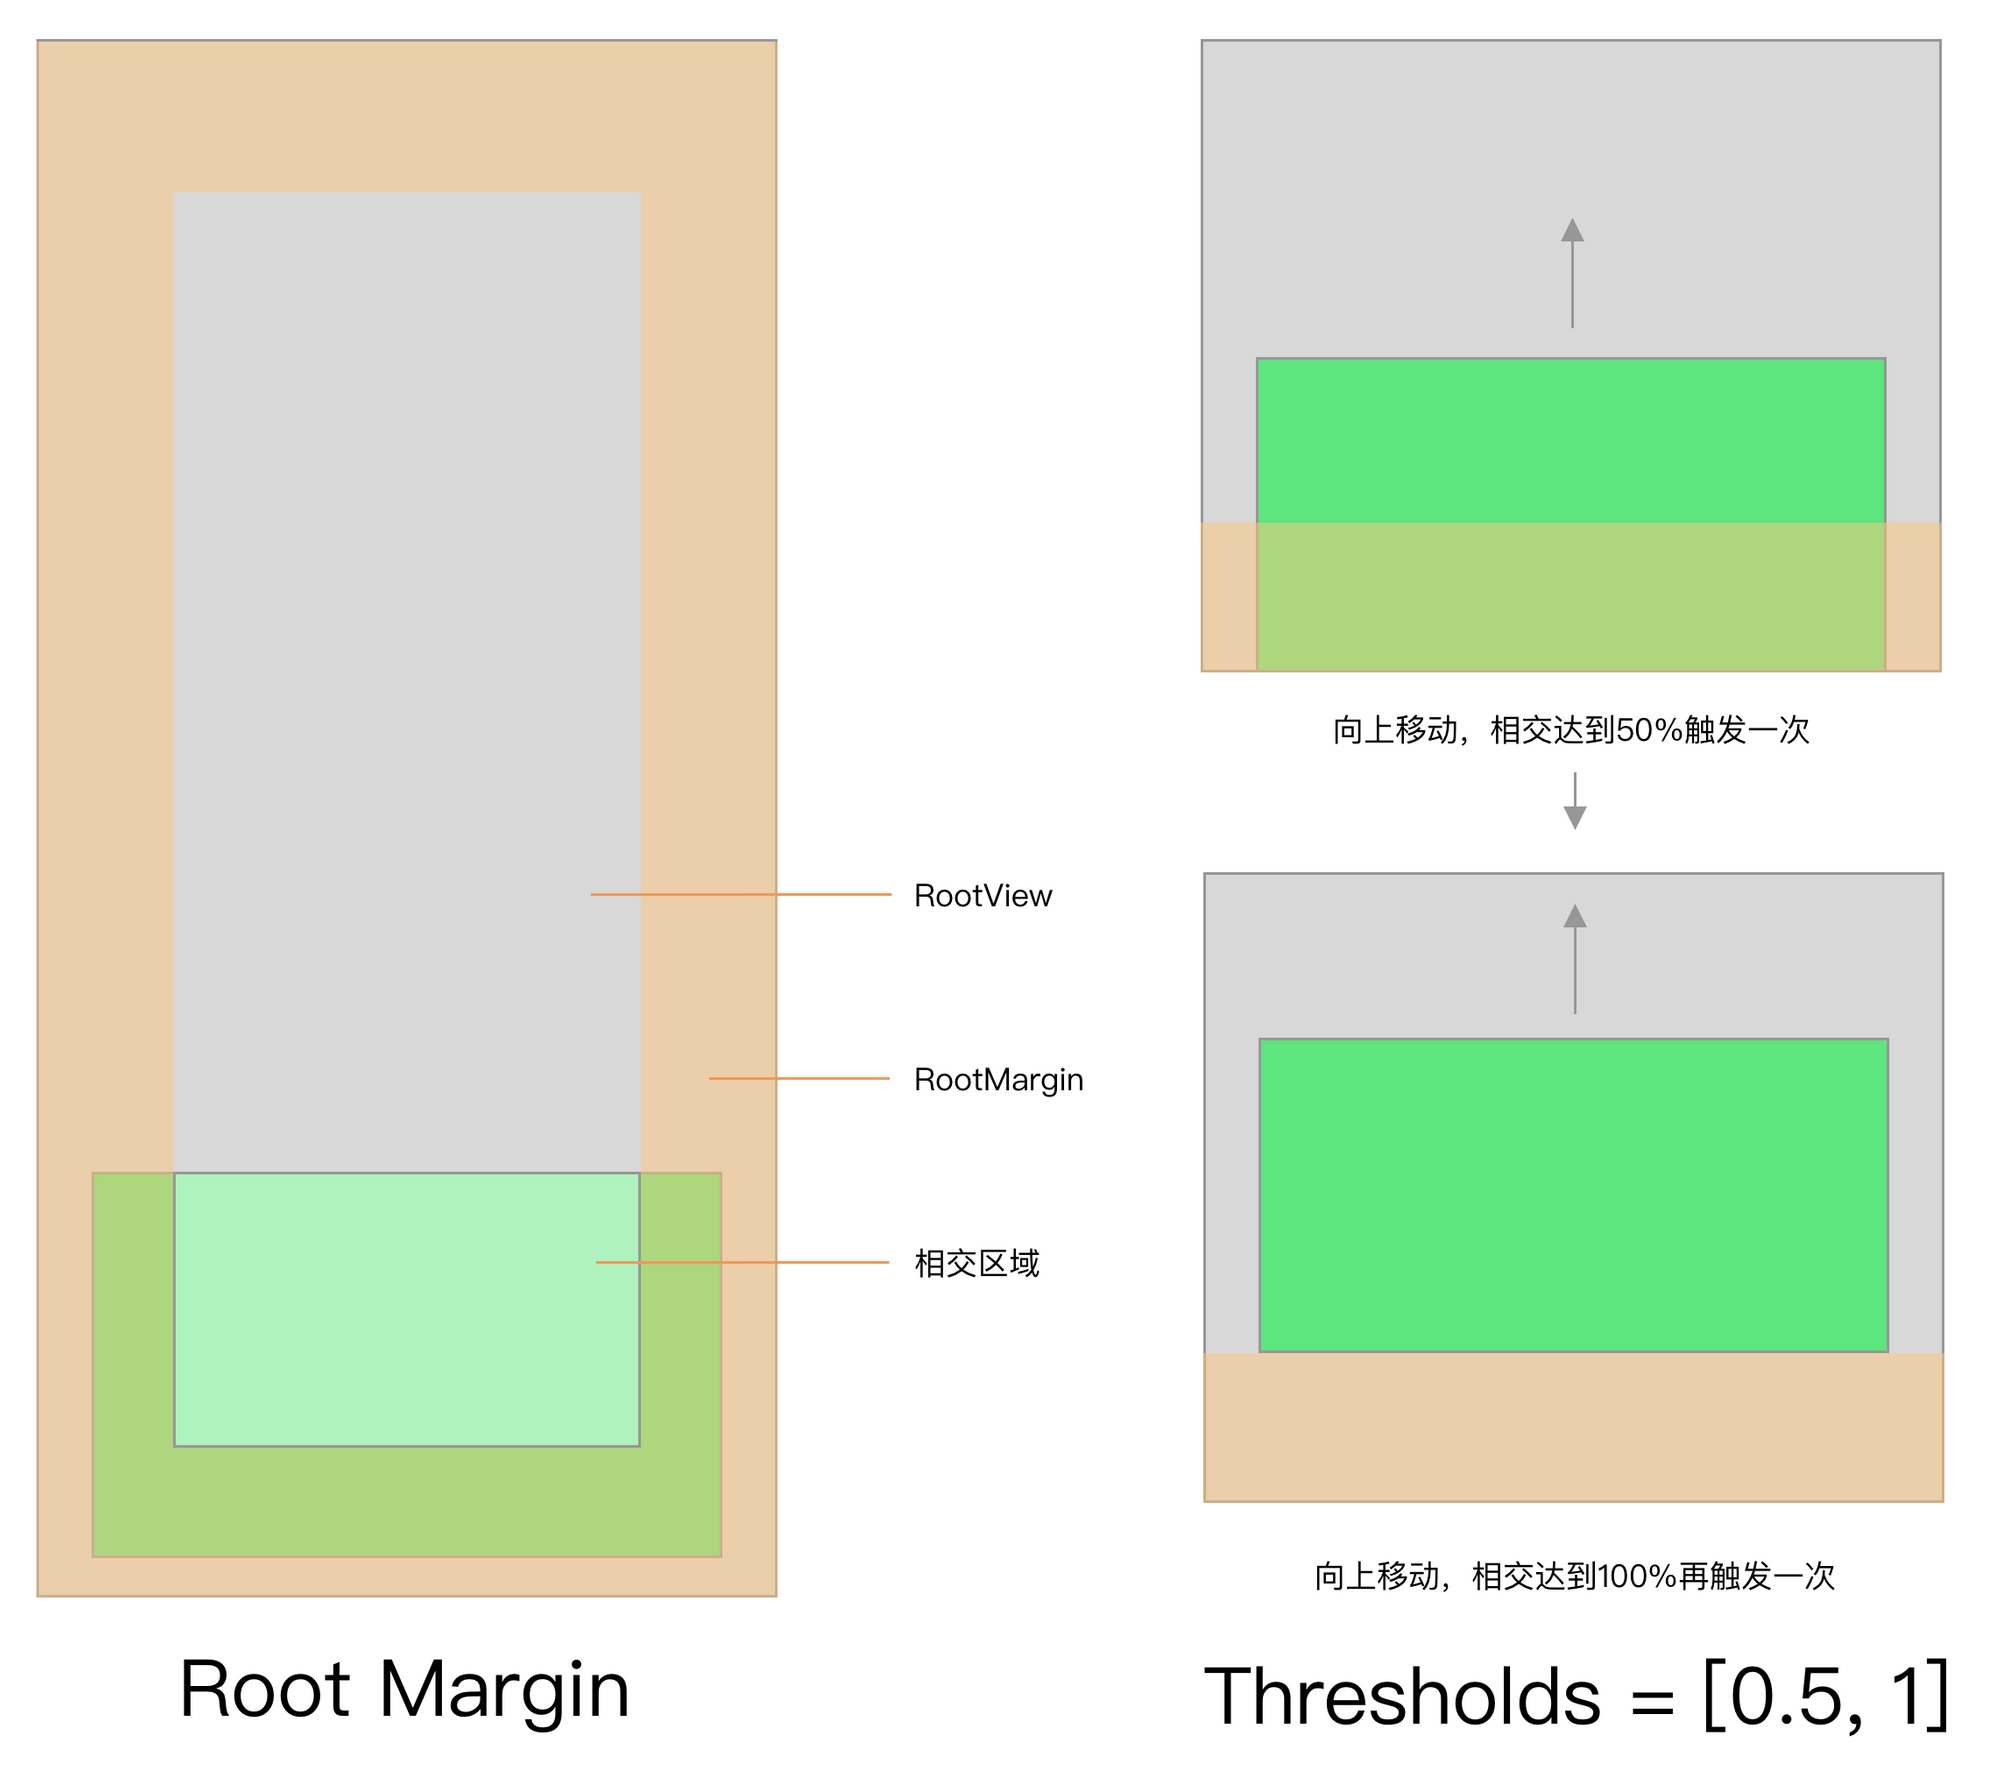
3) 封装便于React Native使用的IntersectionObserverView
由于直接绑定Intersection Observer API的书写方式不太符合React的思维模式,同时通常用一个View包裹需要监听的元素不会带来太大的麻烦,因此本实现在API标准的基础上封装了一个更便于React使用的IntersectionObserverView组件。以下是两种使用方式的对比。
const intersectionObserver = useRef(
    new IntersectionObserver(scope, callbackFunction, {
      rootMargin,
      thresholds,
      throttle,
    })
);
const observeTargetRef = useRef();

useEffect(() => {
	intersectionObserver.observe(observeTargetRef.current);
    return () => {
        intersectionObserver.unobserve(observeTargetRef.current);
    };
}, [])

return (
    <View ref={observeTargetRef} collapsable={false}>
        {/* Your own view */}
    </View>
);<IntersectionObserverView
scope="YourOwnScope"
thresholds={[0.8]}
onIntersectionChange={onTagIntersectionChange}
>
{/* your own view */}
</IntersectionObserverView>
开发中遇到的问题
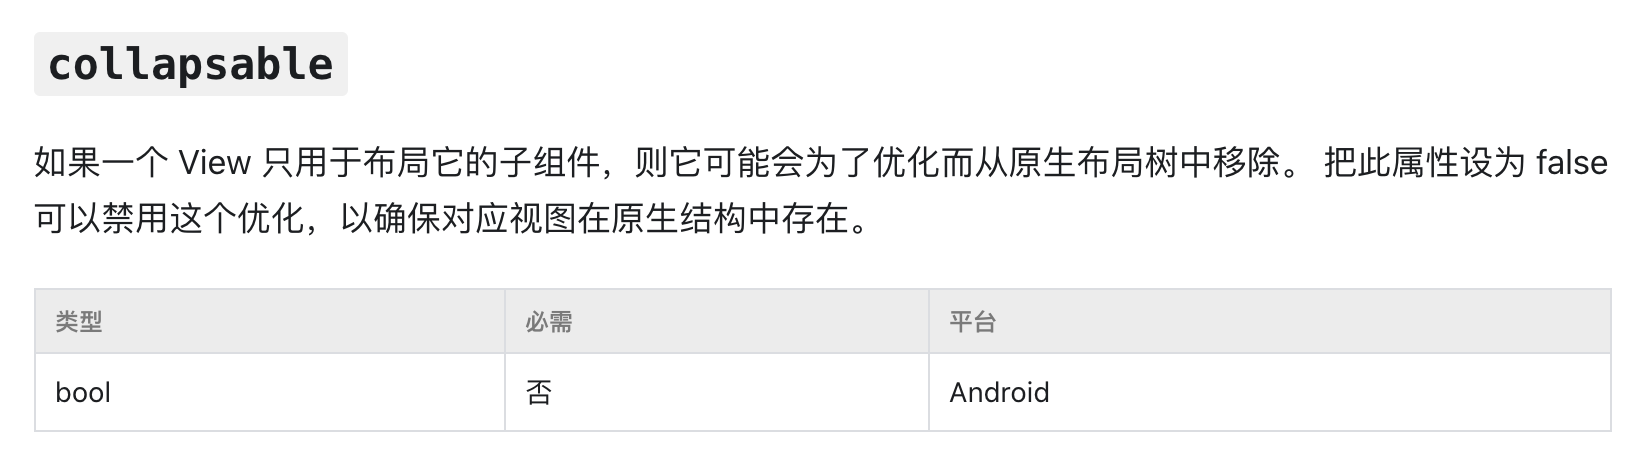
- 在安卓中React Native会对只起包裹作用的View进行移除,导致对应的View被measure时位置信息返回undefined,解决方案:将需要measure的View的collapsable属性设置为false。
3. 使用示例
<IntersectionObserverView
    scope="YourOwnScope"
    thresholds={[0.8]}
    onIntersectionChange={onTagIntersectionChange}
>
    {/* your own view */}
</IntersectionObserverView>
const onScroll = useCallback(
    (event) => {
        IntersectionObserver.emitEvent('YourOwnScope');
    },
    [],
);
return (
    <ScrollView onScroll={onScroll}>
    	{/* Scroll view contains IntersectionObserverView */}
    </ScrollView>
);getReactApplicationContext()
.getJSModule(DeviceEventManagerModule.RCTDeviceEventEmitter.class)
.emit("IntersectionObeserverEvent", { scope: 'YourOwnScope' });参数说明
1) IntersectionObserver / IntersectionObserverView
| 参数名 | 类型 | 含义 |
|---|---|---|
| scope | string | 当前View所属场景,用于触发时区分 |
| rootMargin | {top: number, left: number, bottom: number, right: number} | 触发区域距离屏幕四边的距离 |
| thresholds | number[] | 相交阈值,当相交比例达到设定值时触发回调 |
| throttle | number | 触发检测的时间间隔(ms) |
2) 回调函数
回调函数函数的回调值是一个由所有在本次回调命中了阈值的View,数组的每一个元素结构如下:
| key | 类型 | 含义 |
|---|---|---|
| boundingClientRect | {top: number, left: number, bottom: number, right: number} | 元素四边位置 |
| intersectionRatio | number | 相交比例 |
| intersectionRect | {top: number, left: number, bottom: number, right: number} | 相交区域四边位置 |
| target | Ref | 触发元素的Ref |
| isInsecting | boolean | 是否大于任意一个相交阈值 |
注:使用IntersectionObserverView时由于只有单个View,回调只有单个Entry。
4. 性能优化
1) 通过throttle控制触发频率
<IntersectionObserverView
    scope="YourOwnScope"
    thresholds={[0.8]}
    onIntersectionChange={onTagIntersectionChange}
    throttle={200}
>
 {/* your own view */}
</IntersectionObserverView>
2) 通过scope实现同一个ScrollView中的元素分场景按需触发
页面中通常会存在多个Intersection Observer,但不是每次滚动时都需要触发所有Intersection Observer的检测,因此通过给他们设置不同的Scope,在滚动事件中根据需求触发所需的Scope,可以获得更好的性能表现。
<IntersectionObserverView scope="Animation">
    <!-- Item with intersection animations -->
</IntersectionObserverView>
<IntersectionObserverView scope="Exposure">
    <!-- Item needs report exposure -->
</IntersectionObserverView>
// 示例: 按需触发
const onScroll = () => {
    if (this.state.needAnimation) {
        IntersectionObserver.emitEvent('Animation');
    }
    IntersectionObserver.emitEvent('Exposure');
}
3) 为没有绑定元素的Intersection Observer解绑监听事件
public unobserve = (target: IElementRef) => {
    const index = this.targets.indexOf(target);
    if (index >= 0) {
      this.targets.splice(index, 1);
    }
    if (this.targets.length <= 0) {
      this.emitterSubscription?.remove();
    }
};
解绑这些监听器有助于减轻事件队列的负担同时有利于内存回收。
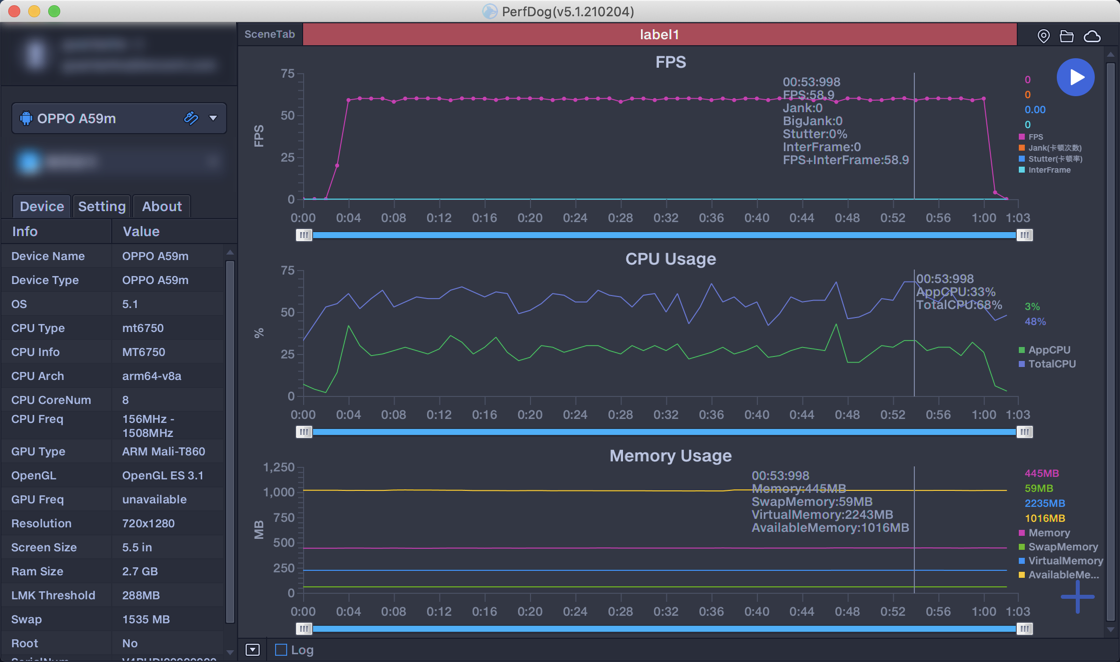
性能测试
我们选取了性能相对较差的 OPPO A59m 平台作为测试平台。在界面中添加十余个IntersectionObserverView后,不断滚动,可见帧率维持稳定。
5. Todos
- 支持设置root参数来指定触发相对的RootView。
- 实现能为任意组件绑定IntersectionObserver的HOC与Hook,简化为任意其他组件绑定IntersectionObserver时的代码修改。
6. 项目仓库
 gtbl2012